What for
Someone who I maintain website for realized the bill of a public cloud provider isn’t exactly as expected. The computing resource falls under “free tier” but the disk isn’t. And the cost of disk usage is the surprise. Second, WordPress does a good job building the initial website but requires a hosting EC2 instance, or at least a container, with extra storage and database service. For many small to micro- business, the content hardly changes after the initial setup. If the owner chooses to minimize the cost of hosting, and is willing to sacrifice the ability to dynamically edit the site, then it makes sense to migrate to a static site.
If the small business just need to start with a static site, simply choose some static website framework such as Hugo or Jekyll.
Backup the original site
WordPress has plugins to backup the original site. We need to produce a restorable backup files in case that the site needs to be re-built as dynamic in the future. All-in-One WP Migration is a great tool for this purpose. It allows you to export the site into a single file for later migration into another wordpress platform. At this point all we need is run an export and keep the file.
Build the static site
WP2Static is the plugin to generate the files needed for a static site. My site isn’t complicated so I didn’t get to test how well it converts dynamic site into static ones. The output is a directory with default html files such as index.html. We use S3 from AWS to host this static site so we need to upload the entire directory to a S3 bucket. The documentation has the detailed recommended configuration. Note that the bucket type should be static website hosting and the permission should not allow public access because it is not very safe and in general not considered a good practice.
Set up CDN and SSL certificate
Using Cloudfront (AWS’ content delivery network) reduces the traffic to S3 bucket and improves security. Here is the guideline. A CloudFront distribution will be created. The distribution should reference the S3 bucket as origin and redirect http to https. The S3 bucket policy should allow CloudFront Origin Access Identity from this CloudFront distribution.
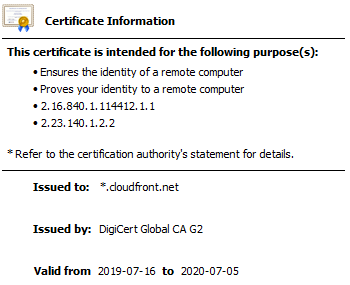
The website should be publicly available using the CloudFront distribution URL at this point and you should notice that the SSL certificate is issued to cloudfront.net
Most likely you will continue to host the site under your own domain name. This guideline explains how to create SSL certificate for CloudFront distribution using AWS certificate manager. This certificate should be issued to your domain.
Update DNS records
To access the site by domain URL, you will need to work with the domain registrar. In this I needed to log on to GoDaddy to remove the original A record and add a CNAME record to point to the cloudfront.net URL for distrubution. This change will take some time to propagate.
Once the change takes effect visitor traffic is directed to the CloudFront distribution.
Tear down the old instance
Once DNS repoint is completed the EC2 instance that hosts dynamic site can be torn down. It is recommended to take a snapshot as it does not take a lot of space on S3.
Side note: if you also need an email service for custom domain, Migadu provides is a good choice. Its SMTP operates on port 587 in StartTLS only (instead of SSL/TLS connection), so your email client must be able to initiate StartTLS. As of this article is written, Gmail Android app works and Hotmail Android app does not work. Even if you specify the port 587, the Hotmail app does not attempt StartTLS.