
In this post, we discuss the resilience test problem and why chaos mesh emerged. Then we go over a lab of chaos mesh with a few experiments.
The Problem
I used to support a server application installed in customer’s data centre. The server application receives data from client application, cleanse the data and put them on customer-managed storage. Unfortunately, the customer-managed storage system hang up from time to time. When this happens, the application does not get an I/O failure to begin with so it continues to serve client traffic with many threads pending for I/O completion. All the threads will fail eventually after a long, unresponsive pause.
What is really bad, is that the server application first acknowledges the client application of the recipient of their data, and then asynchronously archive them to the customer’s storage. In this case, the client applications think they securely send out the data upon receiving acknowledgement. However, the server application lost the data afterwards because it does not interact with storage system in a fail-safe fashion. As a result, I often find myself in the business of restoring client data from the cache directory on the servers, and grumbling about how the quality process allowed this issue slipped into production.
To be fair, this is not an easy catch in the quality assurance process. It is caused by a hardware issue, which is technically the customer’s own problem. However, it is the vendor’s responsibility to design fault-tolerant software. Further, if we put on the site reliability engineering goggle, we see vendor’s software and customer’s hardware as a whole, instead of two disparate silos. The problem is however, how we emulate this kind of fault in house?
Chaos Engineering
A software engineer could have unmounted the storage while the software is active during test. This approach is faulty because it has a couple of issues. First, unmounting the storage does not produce exactly the same symptom. Unmounting the storage in most cases gives a clear failure upfront and the application would have caught it. What we need is a delay in storage long enough to cause a time out. Second, we’d have to perform this activity with an operating system command with sufficient privileges. The software being tested usually do not have such privileges. We need to systematically inject failures of particular kind.
Chaos are interruptions along with the cascading effects, that happen in production but are impossible or extremely difficult to emulate in lower environments through automated quality process. To improve robustness, we need the capability to emulate various failure scenarios in a systematic manner. Chaos Engineering aims to improve such capability.
Chaos Engineering emerged as a discipline to improve software’s ability to tolerate failures while still delivery adequate quality of service. This is known as the resiliency of the software. Suppose the storage has 99.9999% SLA, or 31 seconds of downtime every year. Chaos Engineer requires the functional parts of our software do what they can to protect the data, during the 31 seconds of turbulence each year, instead of just falling apart. In regulated industries, this is critical. Resilience testing is difficult in quality assurance process, but we can’t avoid it.
By definition, Chaos Engineering is the discipline of experimenting on a system in order to build confidence in the system’s capability to withstand turbulent conditions in production. It is particularly useful in distributed system, where network faults are normal. The one-page chaos engineering website has a good summary of such intent. At Netflix, they built Chaos Monkey, a tool to randomly cause failures on certain computing instances in the cloud. It is one of the first Chaos Engineering tools and it is a big step forward. Chaos Monkey can perform one type of experiment (faulty server) and requires writing custom code.
Chaos Mesh
Moving to Kubernetes platform, where everything operates on network, it is even more important to have a suite of resilience testing tools. Thankfully, we have Chaos Mesh, a cloud-native Chaos Engineering platform that helps platform engineers and software engineers simulate faults in a variety of scenarios. There are other chaos engineering tools (such as Litmus, also a CNCF project) but I will just focus on Chaos Mesh in this post because it has longer development history.
With Chaos Mesh, we can run experiments to simulate certain types of faults, including faults on Pod, Network, File I/O, DNS, Time, JVM, Linux Kernel, HTTP. We can also emulate incidents on cloud platforms (Azure, AWS, GCP) and emulate stress. We can even orchestrate multiple experiments into a workflow. Experiments can start ad hoc or on schedule. In addition to Kubernetes platform, the Chaos Mesh team also provides a tool Chaosd to emulate faults on a physical nodes. In the rest of this post, we will install Chaos Mesh and perform four simple experiments using the bookinfo sample application from Istio’s installer.
Demo Platform
In this lab, we install chaos mesh on Minikube on my Mac environment. I have install the platform in a particular way so the experiments will all be successful. I use this script in my real-quick-cluster project to create minikube cluster. This script configures a 3-node minikube cluster, with containerd as CRI, and enables plugins metallb and metrics server. Metallb provides a load balancer for the cluster. Metrics server allows scaling based on metrics, a test scenario for stressor in Chaos Mesh.
I will also install Istio in this lab, because I use it for Ingress and service routing. I also use a sample application called bookinfo which comes with Istio code repository. It is highly recommended to have an ingress as it is used in production, although you may use your own choice of ingress and service routing tool such as ingress-nginx. To install istio, we run this simple script:
#! /bin/bash
curl -L https://istio.io/downloadIstio | sh -
export PATH=$(realpath istio*/bin):$PATH
if istioctl x precheck; then
  echo ready to install istio and label namespace for istio-injection
  istioctl install -f istio-operator.yaml -y --verify
  kubectl label namespace default istio-injection=enabled
else
  echo failed precheck
  exit 1
fi
Below is the content of istio-operator.yaml
apiVersion: install.istio.io/v1alpha2
kind: IstioOperator
metadata:
  name: istio-operator
spec:
  profile: default
  hub: docker.io/istio
  tag: 1.13.2
  namespace: istio-system
  meshConfig:
    accessLogFile: /dev/stdout
  components:
    pilot:
      k8s:
        hpaSpec:
          maxReplicas: 7
          minReplicas: 1
        nodeSelector:
          beta.kubernetes.io/os: linux
        overlays:
          - kind: Deployment
            name: istiod
            patches:
            - path: spec.template.metadata.labels.version
              value: 1.13.2
    ingressGateways:
    - name: istio-ingressgateway
      enabled: true
      label:
        istio: ingressgateway
      k8s:
        hpaSpec:
          maxReplicas: 5
          minReplicas: 1
        service:
          ports:
          - name: http
            port: 80
            targetPort: 20080
            protocol: TCP
          - name: http-dashboard
            port: 8080
            targetPort: 28080
            protocol: TCP
        overlays:
          - kind: Deployment
            name: istio-ingressgateway
            patches:
            - path: spec.template.metadata.labels.version
              value: 1.13.2
            - path: spec.template.spec.containers[name:istio-proxy].lifecycle
              value:
                preStop:
                  exec:
                    command: ["sh", "-c", "sleep 5"]
For more about istio installation, refer to my previous post. Next, we’ll create the namespaces, install bookinfo and install chaos mesh using Helm:
kubectl create ns chaos-testing
kubectl create ns bookinfo

kubectl -n bookinfo apply -f istio/samples/bookinfo/platform/kube/bookinfo.yaml
kubectl -n bookinfo apply -f istio/samples/bookinfo/networking/bookinfo-gateway.yaml

helm install chaos-mesh chaos-mesh/chaos-mesh -n chaos-testing --version 2.2.0 --set dashboard.service.type=ClusterIP --set chaosDaemon.runtime=containerd --set chaosDaemon.socketPath=/run/containerd/containerd.sock
As soon as we install bookinfo, we should be able to access it at http://192.168.64.16/productpage, suppose the IP address is 192.168.64.16. We will simply use HTTP because certificate is not the point of this demo. Note that when we install Chaos Mesh we have to specify the runtime (containerd). Otherwise, we might run into issues when running experiments (e.g. “unable to flush ip sets” for network faults). Before fault injections, we’ll start a curl command and observe the output:
while true; do
  curl -I http://192.168.64.16/productpage --connect-timeout 4 --max-time 5
  sleep 5
done
We can watch the output of the command above as we inject each of the following faults later on.
Chaos Mesh UI
Since we installed chaos mesh as cluster IP service, we need to expose it using Istio Gateway and Virtual Service with the following manifest. If you have your own choice of Ingress, use a corresponding ingress resource.
apiVersion: networking.istio.io/v1alpha3
kind: Gateway
metadata:
  name: chaos-dashboard-gateway
  namespace: chaos-testing
spec:
  selector:
    istio: ingressgateway
  servers:
  - port:
      number: 8080
      name: http
      protocol: HTTP
    hosts:
    - "*"
---
apiVersion: networking.istio.io/v1alpha3
kind: VirtualService
metadata:
  name: chaos-dashboard-vs
  namespace: chaos-testing
spec:
  hosts:
  - "*"
  gateways:
  - chaos-dashboard-gateway
  http:
  - route:
    - destination:
        port:
          number: 2333
        host: chaos-dashboard
Once we configured Virtual Service and Gateways, and waited all Pods in chaos-testing namespace to come up, then we should be able to access the web portal of chaos mesh at 192.168.64.16:8080. Follow the on-screen instruction to fetch the token for access at Cluster level.
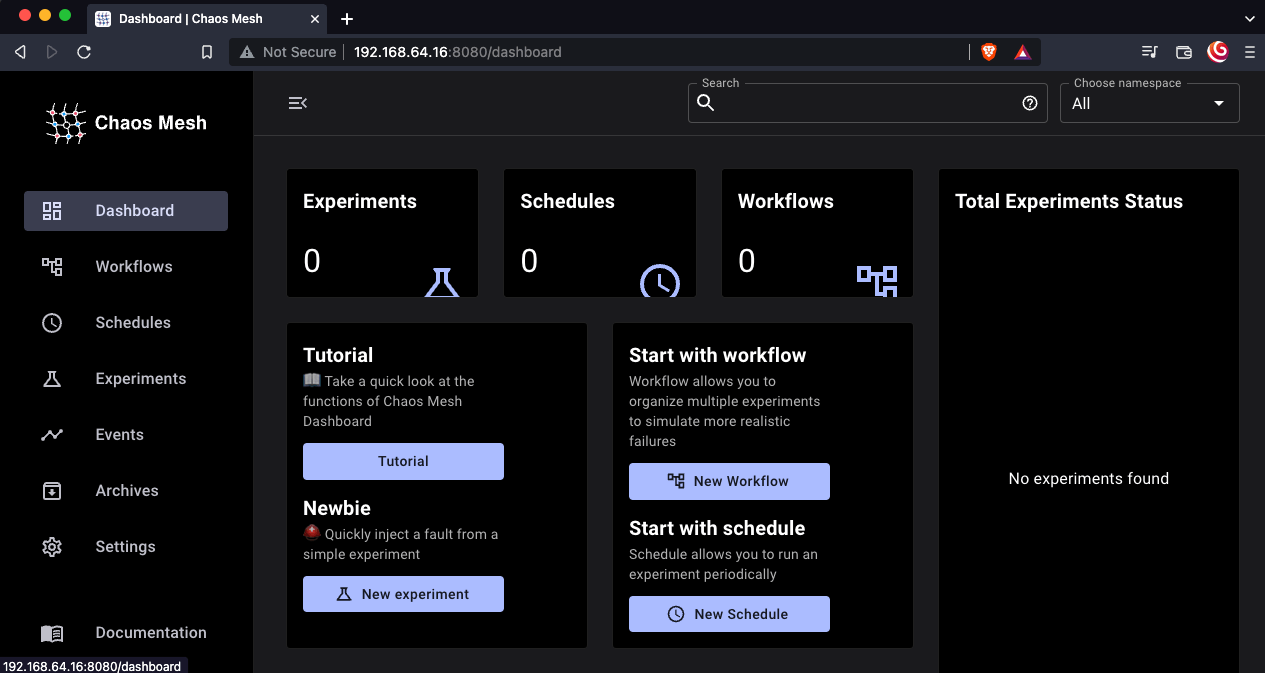
Now, we can create experiments, either using web portal, or using their CRDs. We will use CRDs in this demo.
Network Latency Injection
In this section we artificially introduce a network latency of 3 seconds for a period of 45 seconds. It takes effect as soon as we create the NetworkChaos CRD as below:
apiVersion: chaos-mesh.org/v1alpha1
kind: NetworkChaos
metadata:
  name: network-delay
spec:
  action: delay # the specific chaos action to inject
  mode: one # the mode to run chaos action; supported modes are one/all/fixed/fixed-percent/random-max-percent
  selector: # pods where to inject chaos actions
    namespaces:
      - bookinfo
    labelSelectors:
      app: productpage
  delay:
    latency: '3s'
  duration: '45s'
Watch for the curl output, which normally returns 200 code every 5 seconds, now fails for about 45 second window.
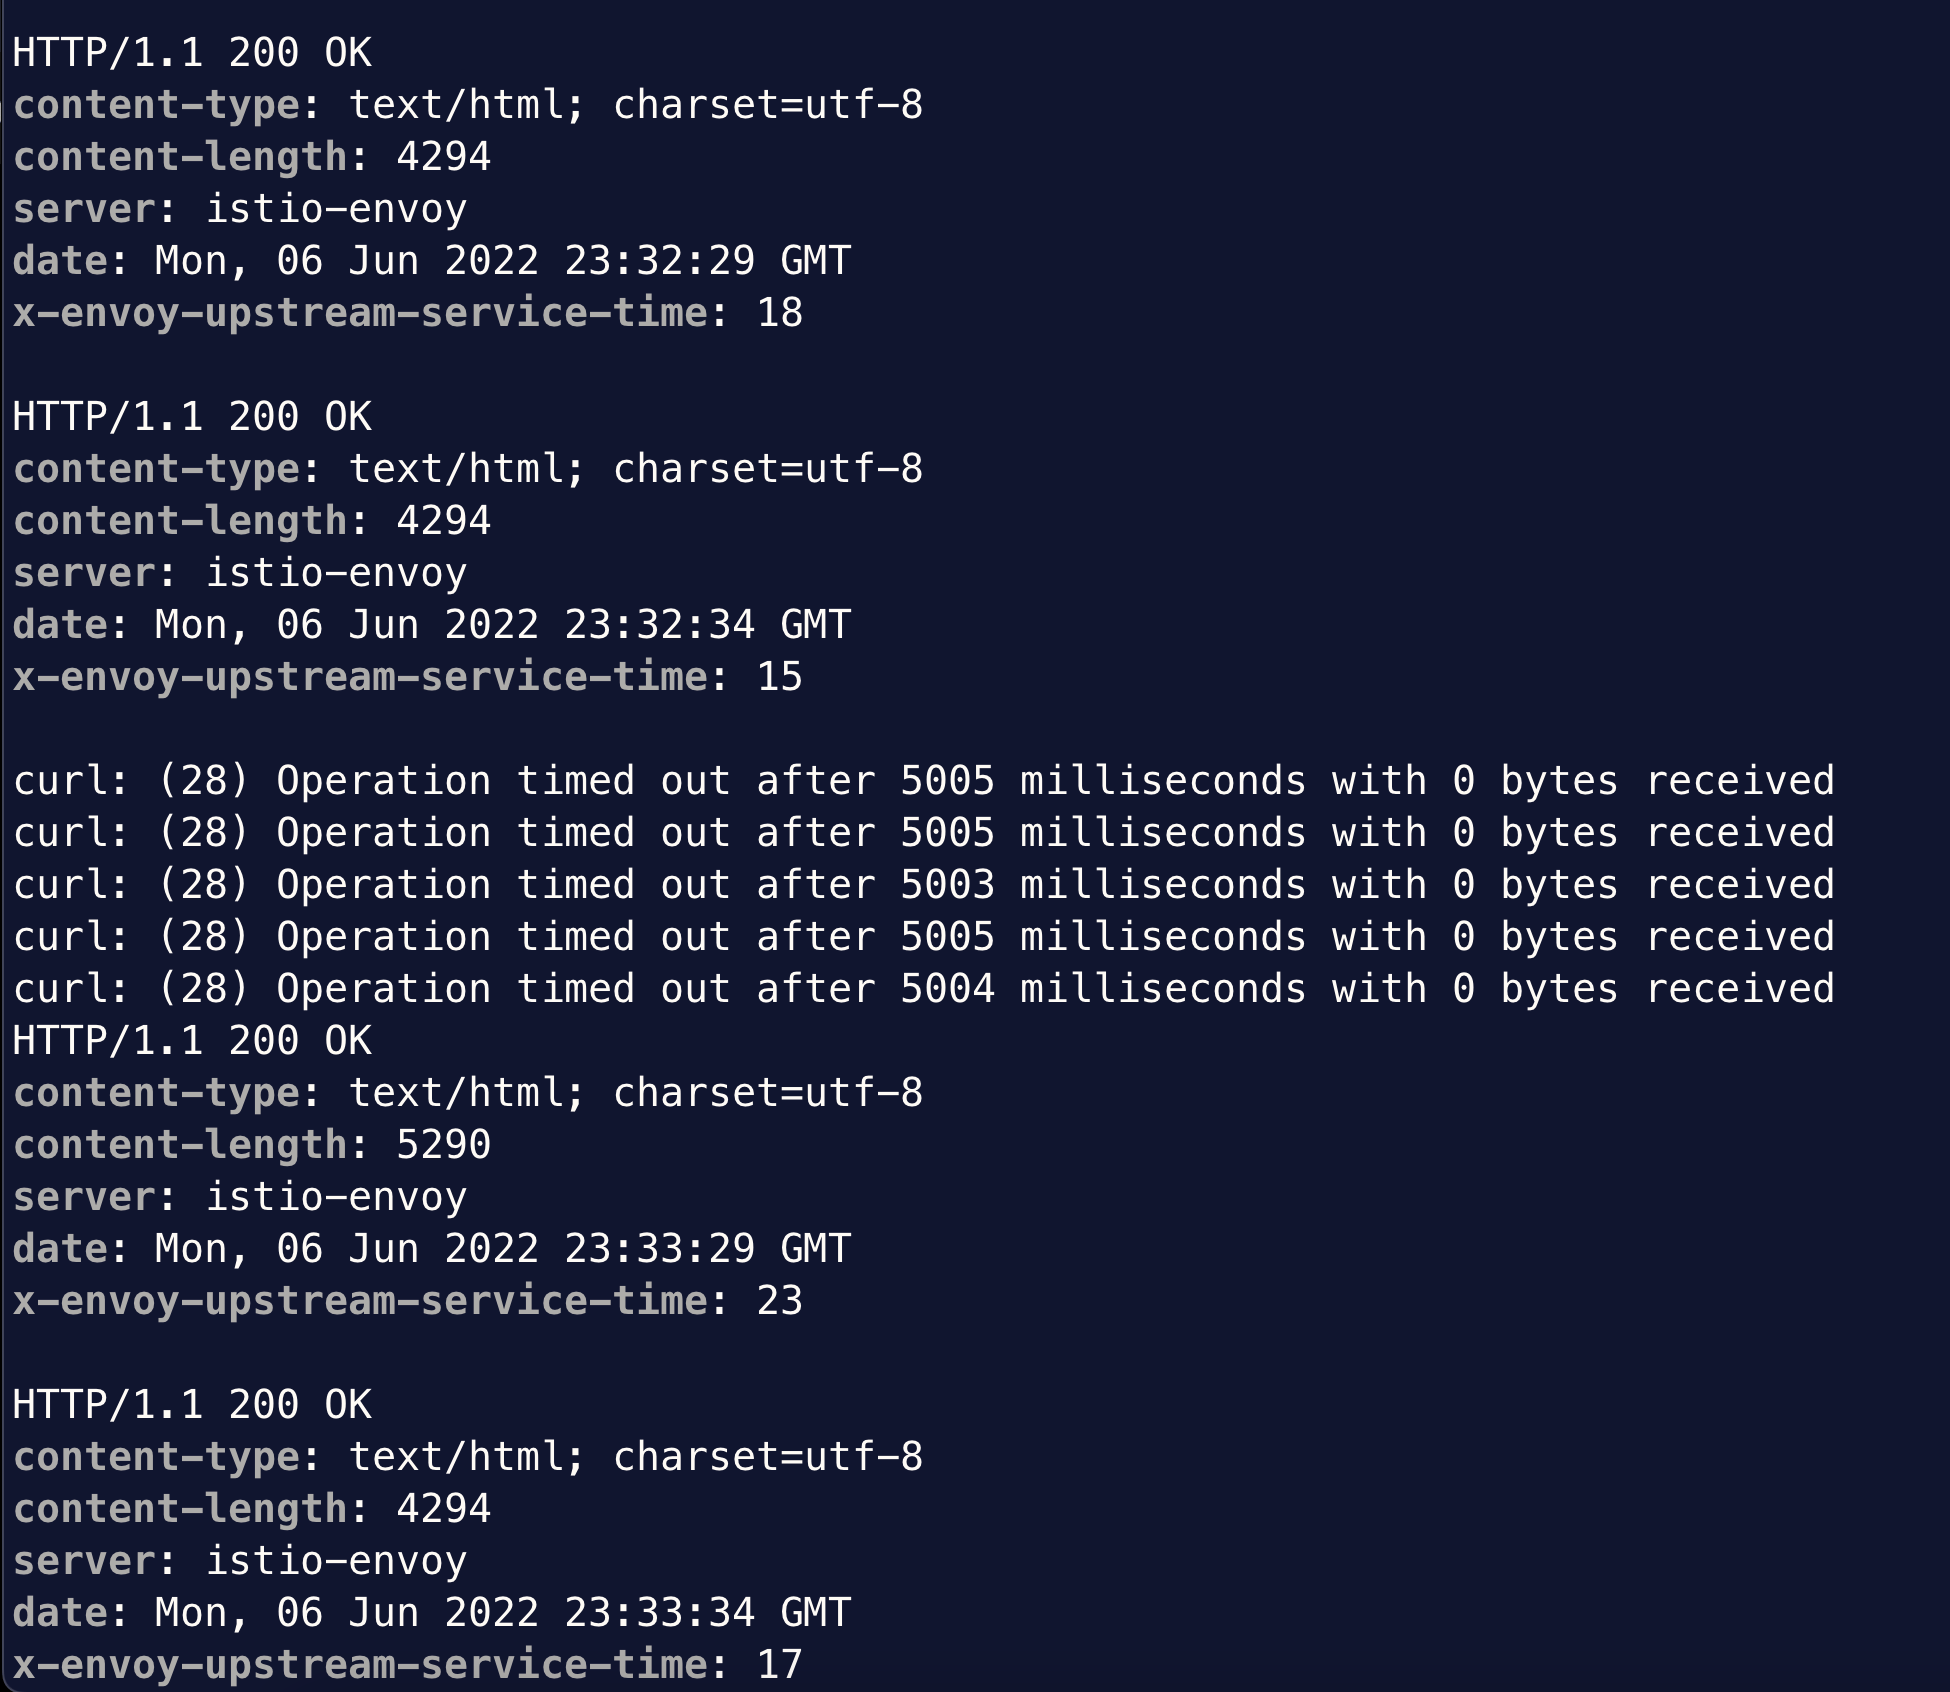
After the window of latency injection, the curl test returns normal. During the experiment, we can check the status of the fault injection by describing the NetworkChaos object. Alternatively, we can look at Experiments and Events in Chaos Mesh web portal. When completed, we can delete the NetworkChaos object. Alternatively, we can archive the experiment from web portal.
HTTP Failure Injection
The NetworkChaos API injects faults at Pod’s network layer. HTTPChaos API introduces HTTP error. We can configure an HTTPChaos object following the instruction:
apiVersion: chaos-mesh.org/v1alpha1
kind: HTTPChaos
metadata:
  name: test-http-chaos
spec:
  mode: all
  selector:
    namespaces:
      - bookinfo
    labelSelectors:
      app: productpage
  target: Request
  port: 9080
  #method: GET
  path: '*'
  abort: true
  duration: 2m
This object intercepts HTTP calls to the Pods as labelled and aborts the request. If we monitor the curl output at the same time, we can see that it starts to receive 503 error as soon as we injected the fault.
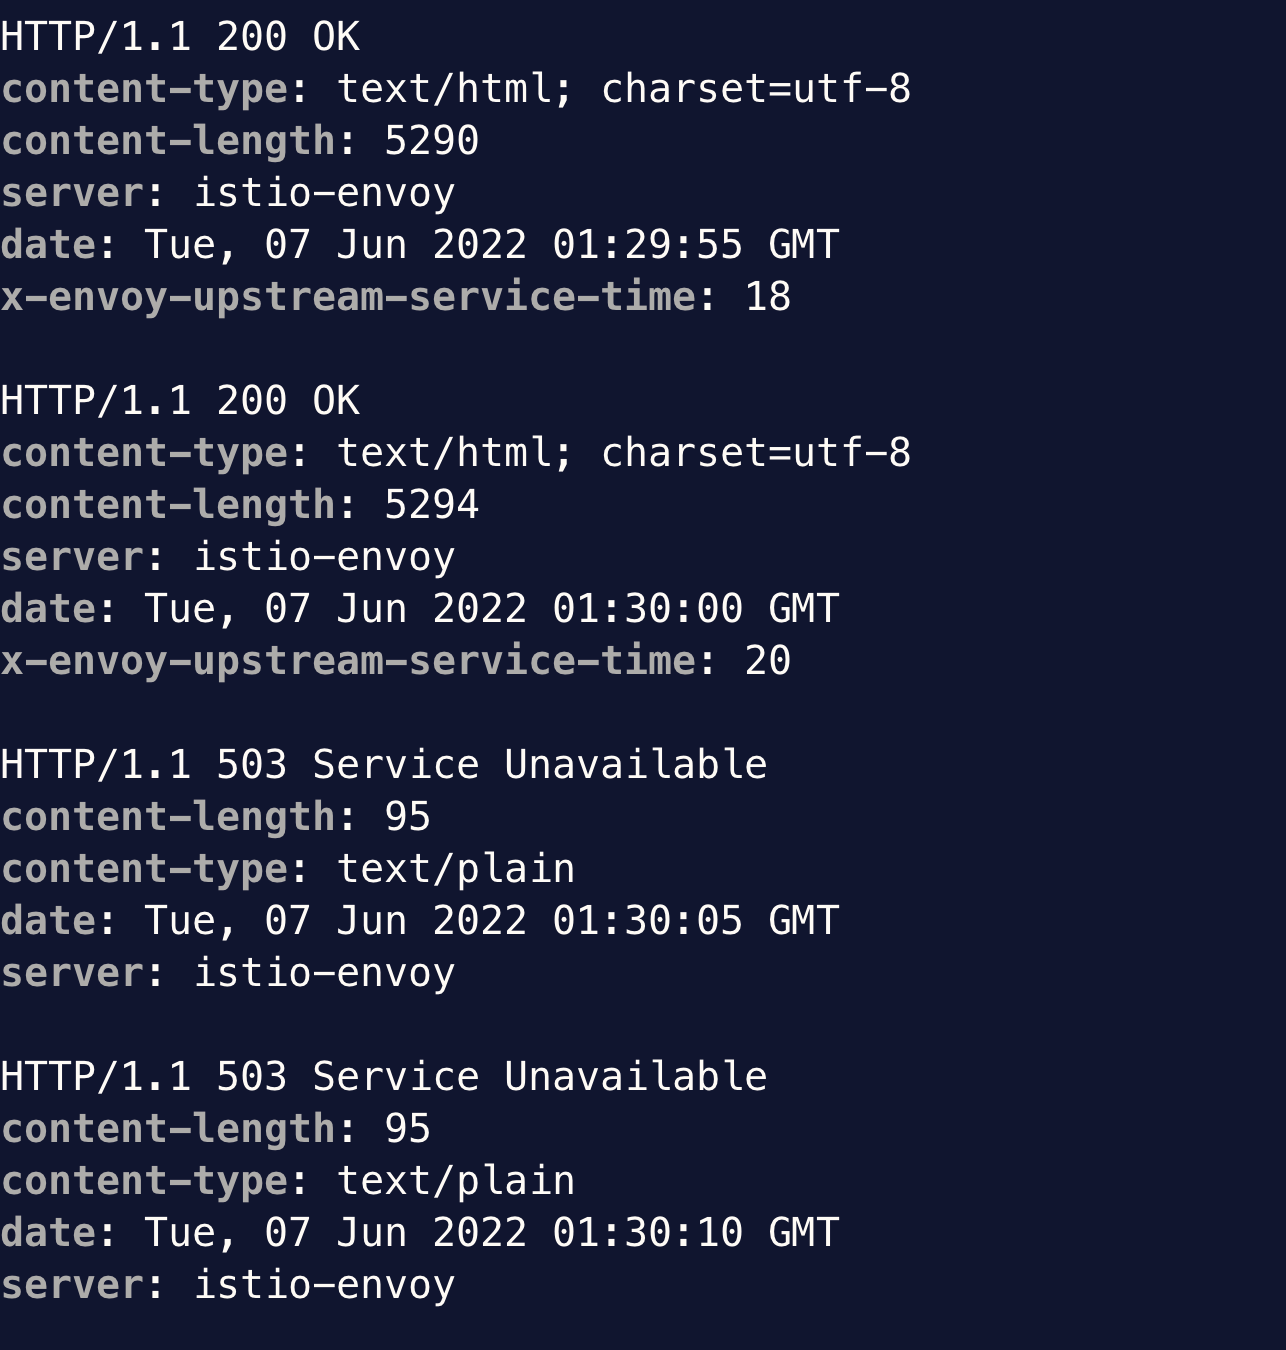
Once we remove the HTTPChaos object, the return code becomes 200 again.
Pod Failure Injection
We can emulate a fault that kills a Pod with the following manifest:
apiVersion: chaos-mesh.org/v1alpha1
kind: PodChaos
metadata:
  name: pod-failure-example
spec:
  action: pod-kill
  mode: one
  duration: '30s'
  selector:
    namespaces:
      - bookinfo
    labelSelectors:
      app: productpage
In the mean time, watch for the Pods in the bookinfo namespace, we’ll notice the old Pod being terminated.
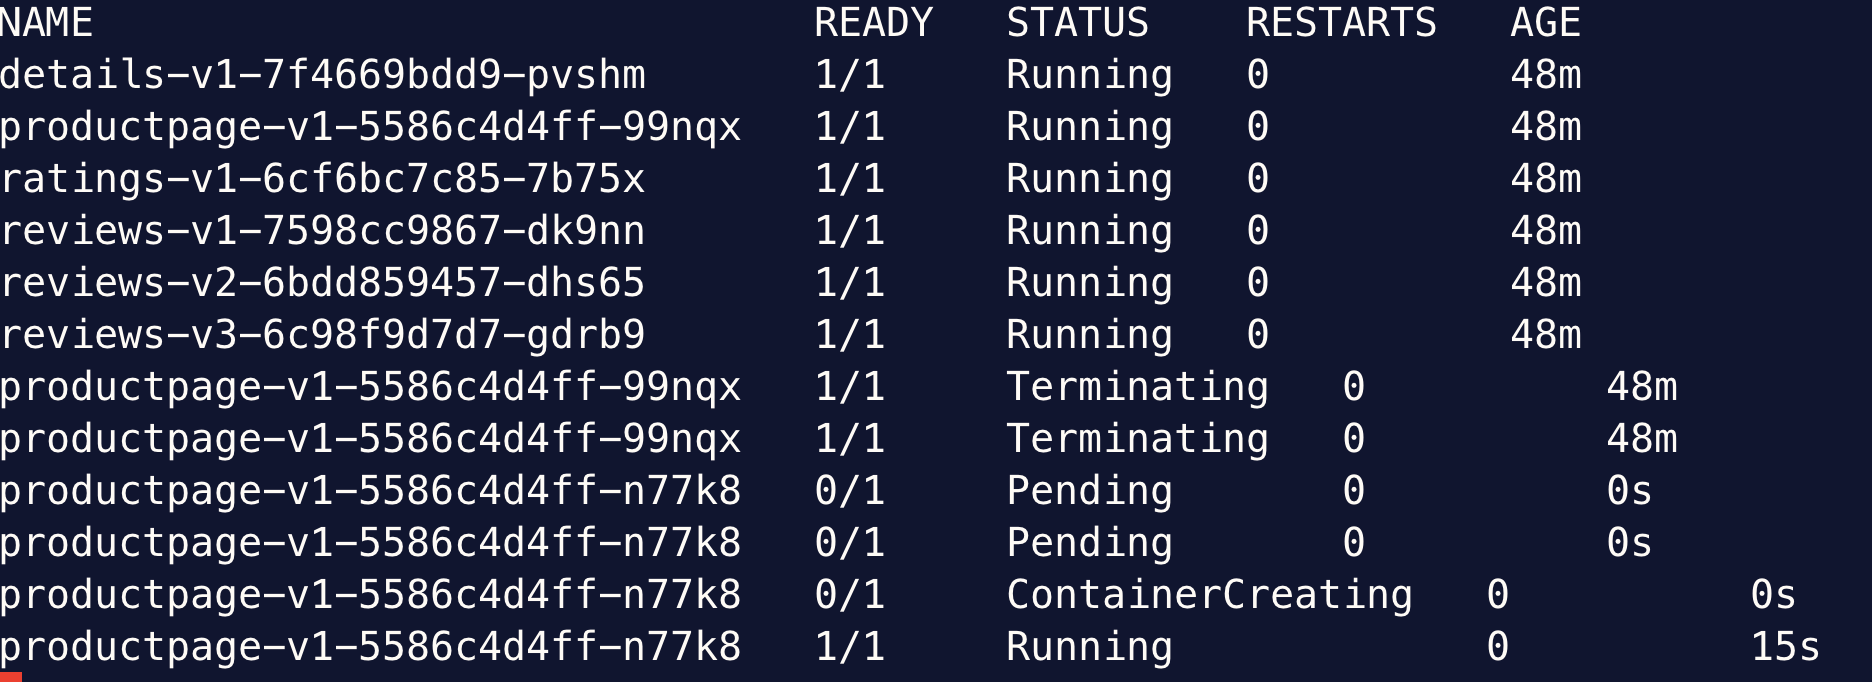
Because the Pod is managed by a replica set, the replica set brings up a new Pod to ensure the desired number of replicas.
Stressor
In this experiment, we add an HPA (Horizontal Pod Autoscaler) to the productpage deployment, emulate a memory stress to the Pod and watch it scale up. Before the testing, we need to first configure a resource request for memory for the deployment. To configure memory request, edit the deployment productpage-v1 by adding memory request:

Then we add an HPA as below:
apiVersion: autoscaling/v2
kind: HorizontalPodAutoscaler
metadata:
  name: productpage-deploy
  namespace: bookinfo
spec:
  maxReplicas: 4
  minReplicas: 1
  scaleTargetRef:
    apiVersion: apps/v1
    kind: Deployment
    name: productpage-v1
  metrics:
  - type: Resource
    resource:
      name: memory
      target:
        type: Utilization
        averageUtilization: 70
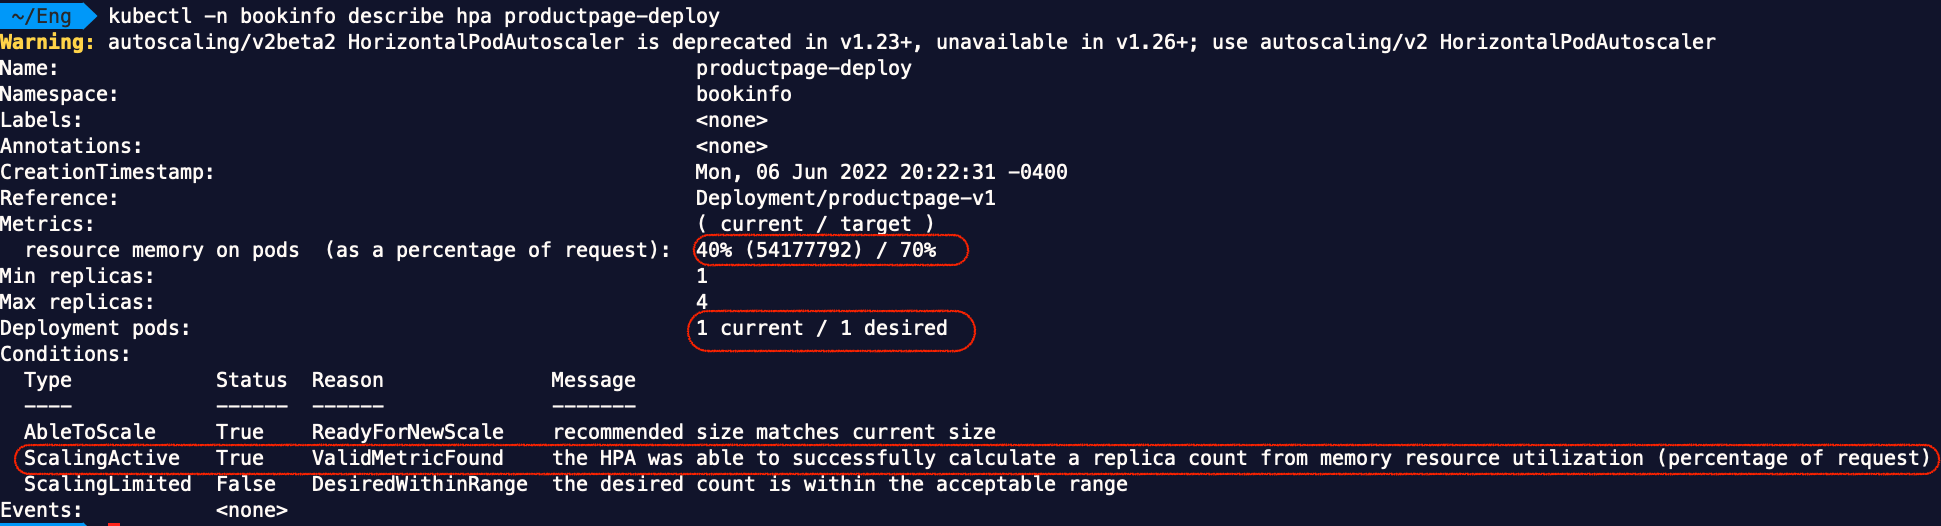
Now if we describe the HPA, we shall see that HPA is active:
Then we create a StressChaos object as below:
apiVersion: chaos-mesh.org/v1alpha1
kind: StressChaos
metadata:
  name: memory-stress-example
spec:
  mode: one
  selector:
    namespaces:
      - bookinfo
    labelSelectors:
      app: productpage
  stressors:
    memory:
      workers: 2
      size: 128MiB
It will take some time for the HPA to detect the memory stress and scale up. We can tweak this with scaling policy. After scaling activity, the HPA status will report with the new desired number of replica:

We can also confirm that by checking the deployment size. If we want the size to reduce after we remove the stressor, we need to configure HPA accordingly with scale down triggers.
Chaos Mesh uses stress-ng utility to emulate memory or cpu stress on a Pod.
Summary
Chaos mesh is a cloud native resilience testing tool. It supports many fault experiments not only on Kubernetes, but also on virtual machines. I wish I came across this tool sooner in my professional life. Had I had chaosd in the past, I could have incorporate it in our quality assurance process on Linux platform. Without Chaos Mesh, we’d have to use different utilities for different types of faults (e.g. stress or stress-ng for cpu and memory stress). In the domain of platform engineering on Kubernetes, it helps not only software developers, but also platform engineers with correct configuration for workloads on Kubernetes. In this post we explored four types of faults. For more about all fault types and their attributes, go to their documentation for more details.